"Living my life like its golden" with Pickaxe Studio
How to monetize AI and start earning today.
The Pickaxe Studio allows anyone to start earning money from their creations in just 3 easy steps.
It’s that easy! But let’s break each step down in an illustrated guide to make it even easier.
Before we Begin
In order to use the Pickaxe Studio you’ll need to sign up for an account and verify your e-mail.
Step 1 - Create a Pickaxe
After you have created your account click on Create a Pickaxe in the top menu of the homepage.
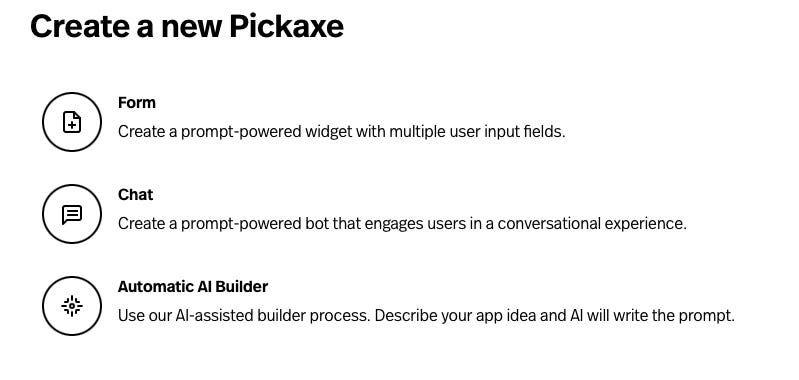
Select the type of Pickaxe you’d like to create.
A Form is sort of like an AI-Powered google form where you create a series of fields and then write a script around them. The Pickaxe will then read the form like an ai-assisted Mad Lib and produce a response.
Pro tip: Turn on “Enable chat responses” and your Pickaxe will activate as a chatbot to allow your user to continue refining its response.
A Chat is a custom chatbot similar to an OpenAI GPT.
Pro tip: Easily transform your GPTs into Pickaxes using this handy guide.
The Automatic AI Builder will help guide you through the process of creating a Form.
Pro tip: The Pickaxe Generator combines Semantic Prompt Design with a scripted process inspired by OpenAI’s GPT Builder to guide you through creating a robust custom chat bot that is easy to tune to your needs.
Create your first Pickaxe
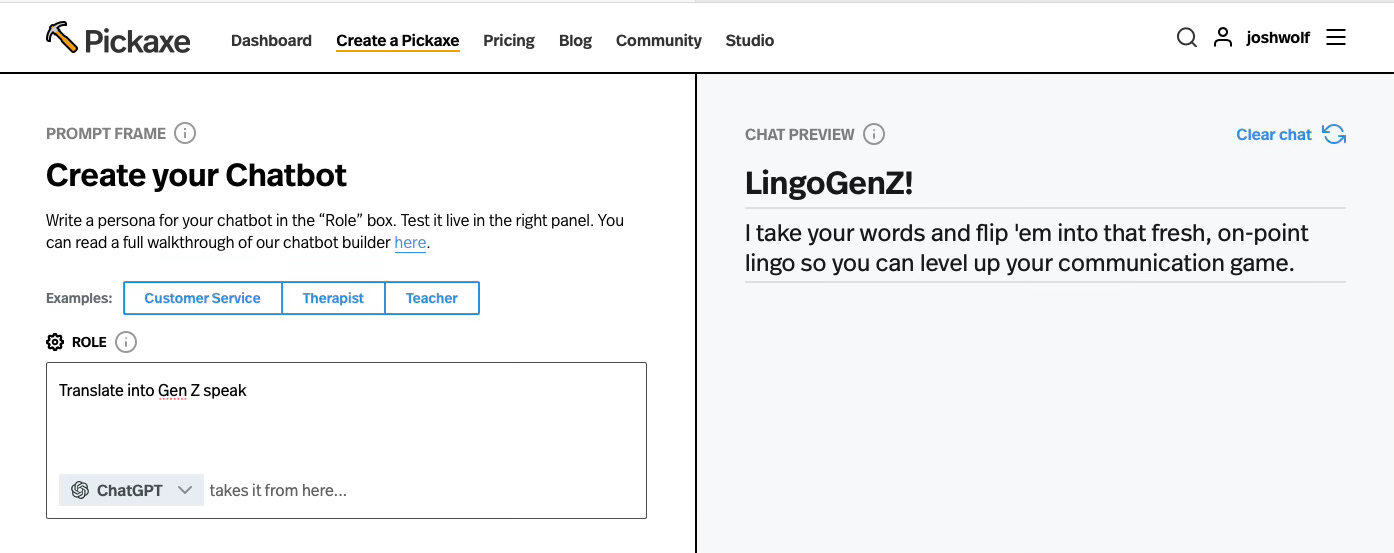
For our demonstration we’ll create a Chat.
In just one sentence we’ll create a Gen Z translator to help millennials understand what their kids are talking about.
Under Role we wrote “Translate into Gen Z speak.” Then on the righthand column we named our Chat “LingoGenZ!” and wrote the following description: “I take your words and flip ‘em into that fresh, on-point lingo so you can level up your communication game.”
Pro tip: If you’re feeling uninspired or lazy when it comes to naming and describing your Pickaxe just ask it to do the work for you. If you don’t like what it provides ask for options to choose from.
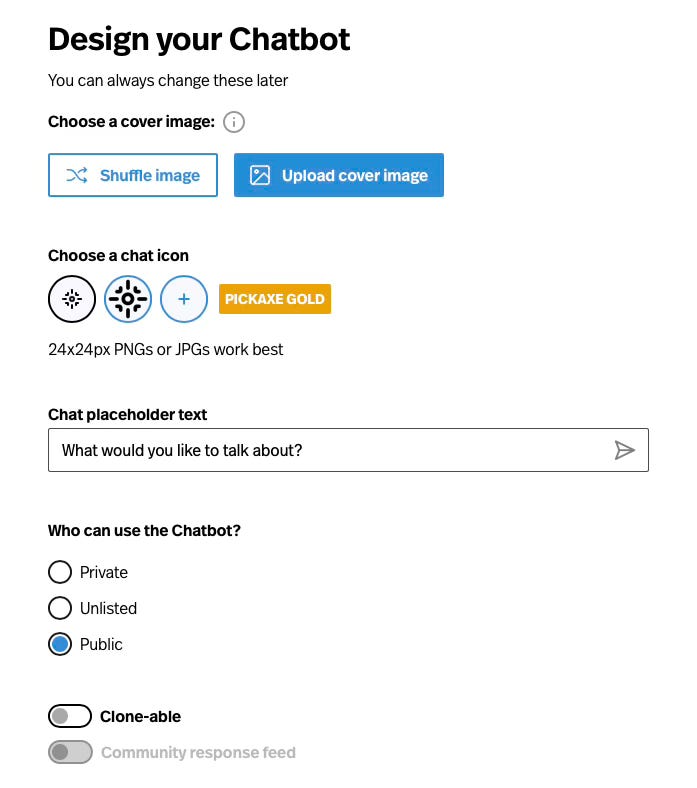
Now you have the choice to select a cover image for your Chatbot along with a chat icon.
Pro tip: Create a square cover image using your favorite AI image creator, but keep in mind the actual cover image used by Pickaxe will be a circle. For the chat icon, you may want to use the favicon from your Web site; think of it as a tiny little avatar image representing your brand.
The Placeholder text is what your users will see until they start to type. You a then decide whether or not to make your chatbot public. Clone-able will allow others to duplicate your chatbot.
Pro tip: If you allow your chatbot to be Clone-able then others will be able to see your original prompt.
Step 2 — Build a Studio
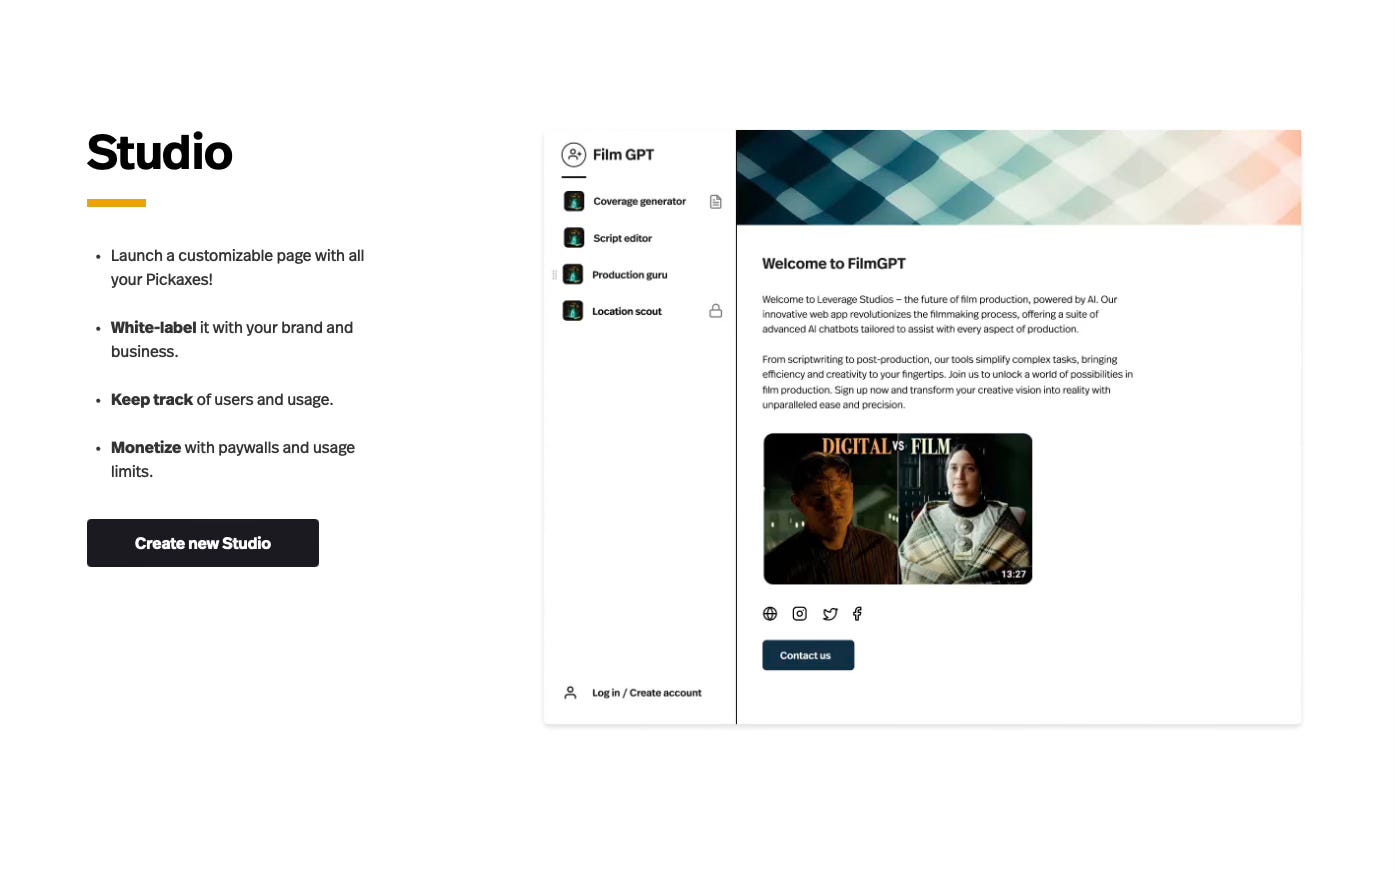
Feel free to make as many Pickaxes as you’d like to include in your first studio. You’ll be able to add additional Pickaxes later. Whenever you’re ready just click Studio in the primary menu.
When you click “Create new Studio” on the screen above, you’ll be taken through a quick process to launch your studio.
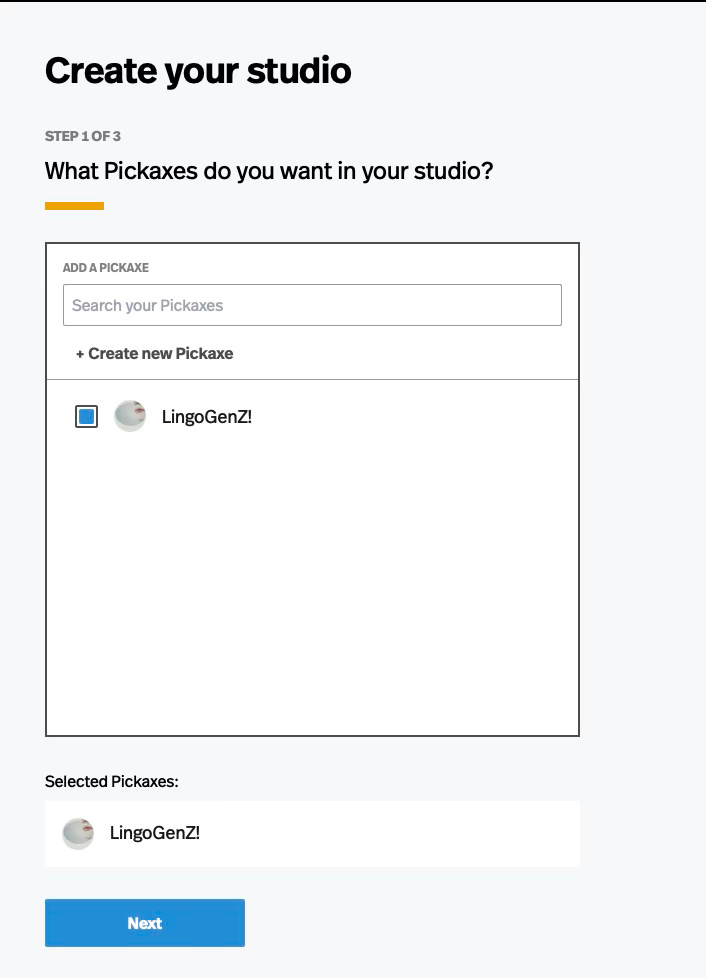
The first thing you’ll see is a list of your pickaxes. Use the box on the right to select which Pickaxes you’d like to include in your studio.
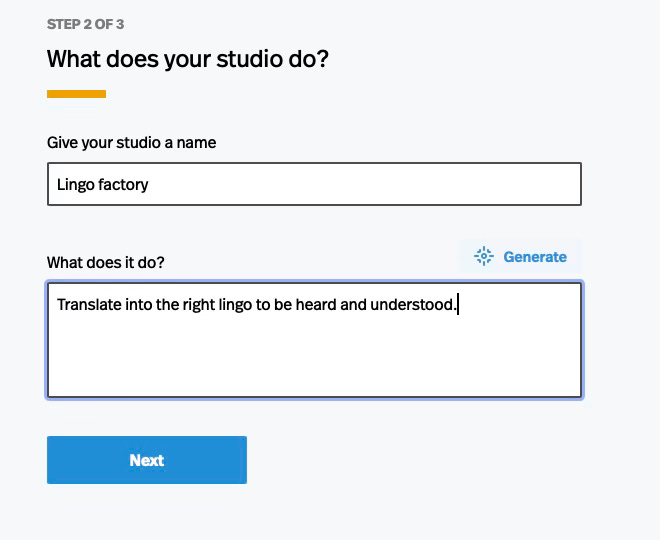
After selecting what Pickaxes to include you’ll be taken to a screen where you can name your studio and provide a description. In this case, we plan to create additional fun translation tools so we’re going to call our studio Lingo Factory.
Pro tip: You can modify the name and description after you launch your studio. If you’re struggling for what you want to say, use the Generate button above the dialogue box and the Pickaxe AI will try to come up with the best description automatically.
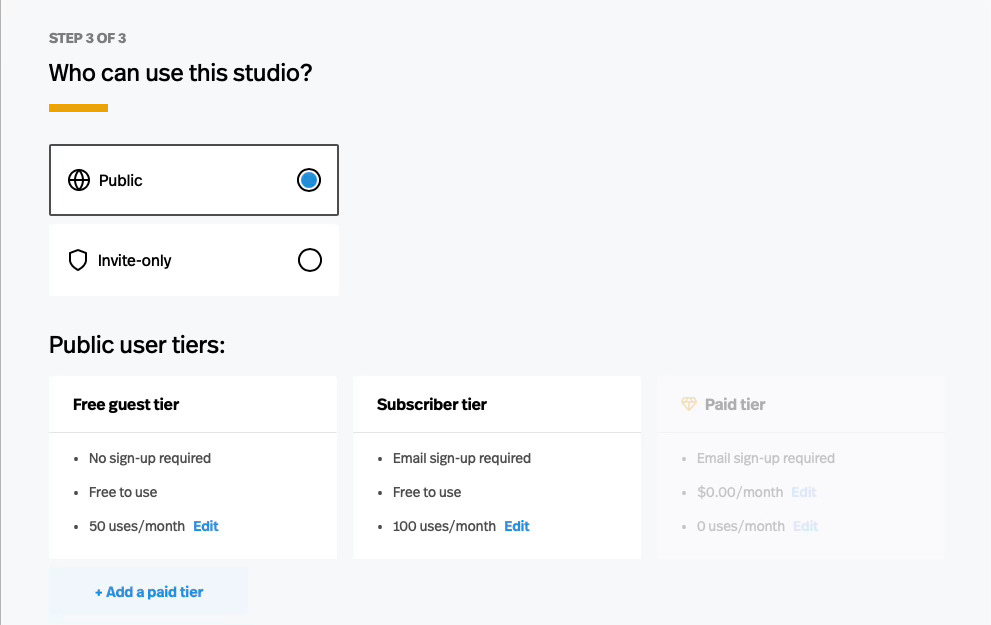
Finally you will need to decide whether to release your studio to the public or make it available only to those you invite.
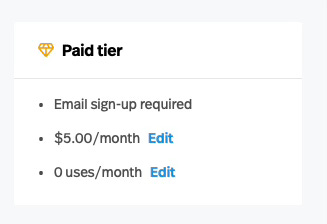
If you want to monetize your Pickaxe be sure to select “+ Add a paid tier” at the bottom. When you do the Paid Tier box will no longer be grayed out.
Now you need to decide how many times visitors to your studio should be able to use your tool before they need to register as a free user. This goes in the right column for “Free guest tier.”
Next you can select how many times free subscribers can use it before they have to upgrade to a paid user. This number goes into the middle column under “Subscriber tier.”
After you have unlocked the “Paid tier” column, you can choose the monthly price to charge for access as well as decide whether to provide unlimited use to paid subscribers or establish limits.
Pro tip: When setting your price keep in mind that you’ll be paying both Stripe’s processing fees along with a 20 percent revenue share with Pickaxe, so be sure to adjust accordingly.
Step 3 — Register with Stripe
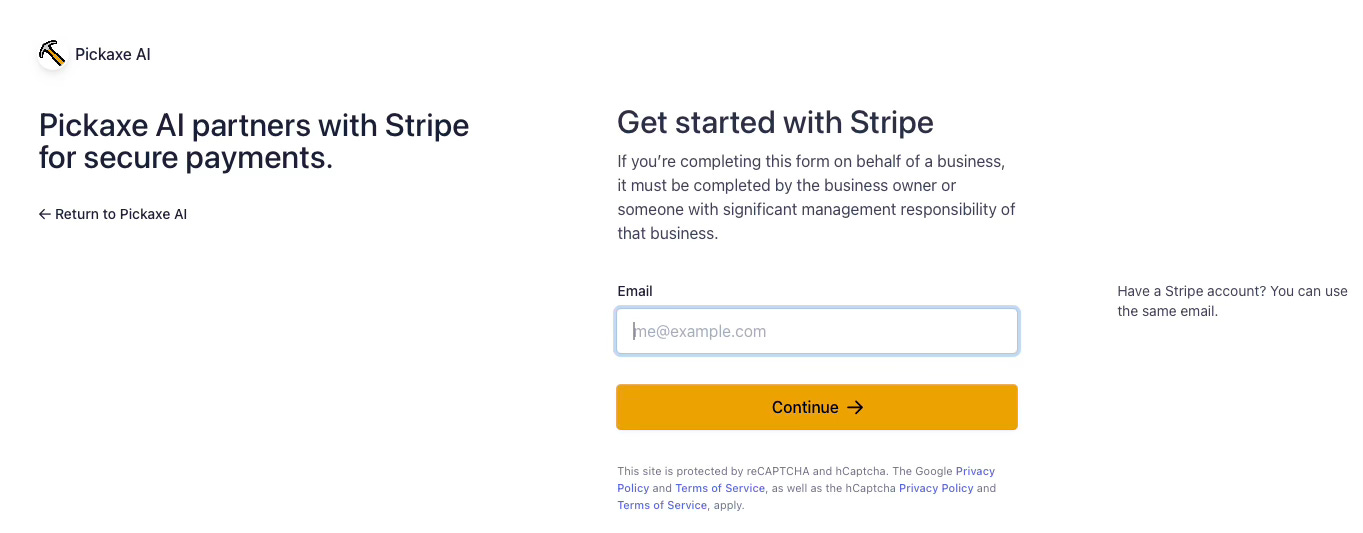
After creating your studio you will be asked to connect a Stripe account to activate payments.
Stripe is a payment processor that is easy to use and trusted by many of biggest sites online. In order to get started using Stripe you will need to provide and verify your e-mail address.
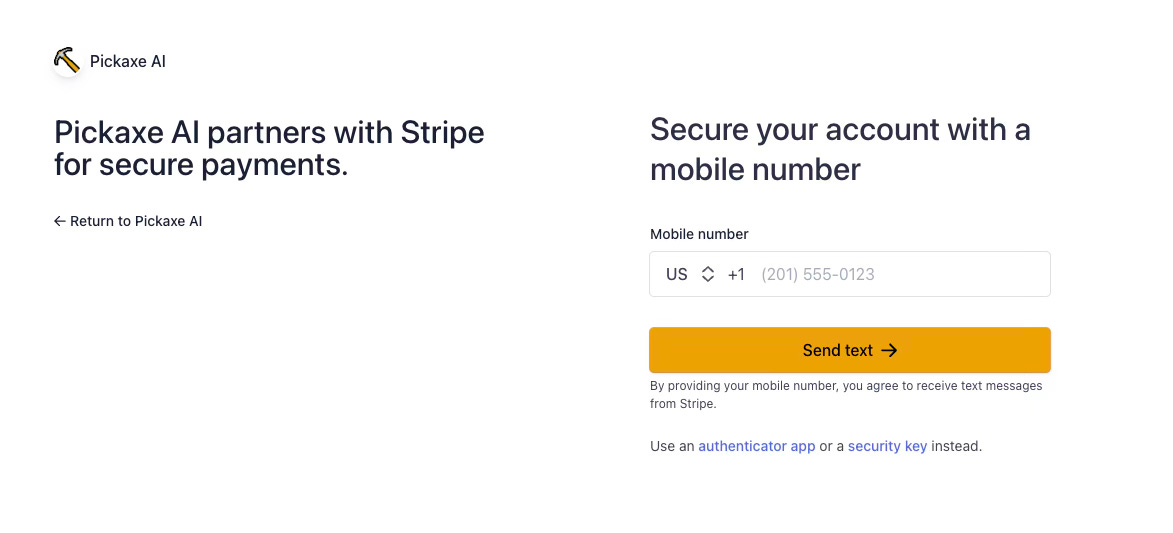
Stripe will then ask for your phone number in order to further verify your account and prevent fraud.
When you successfully verify your account you’ll be provided an important code that you’ll want to put in a safe place.
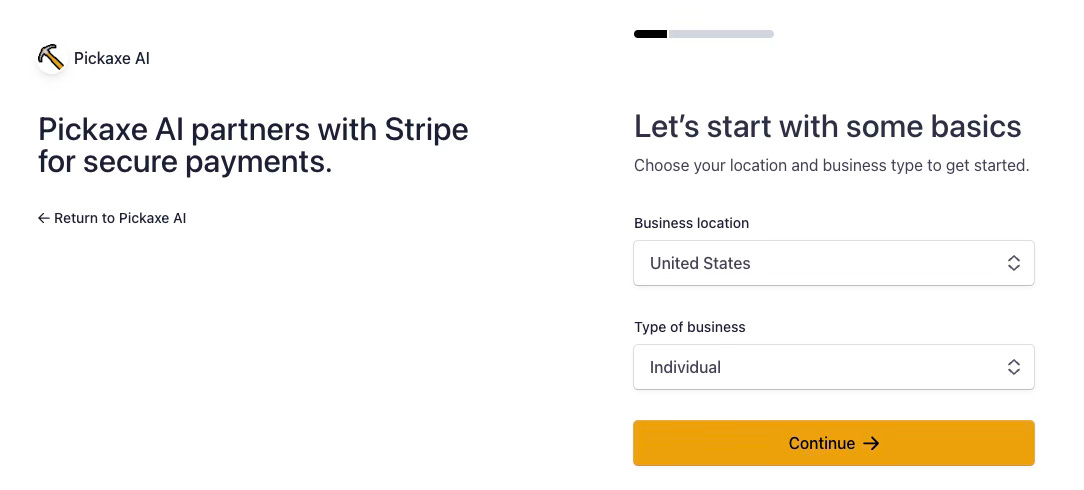
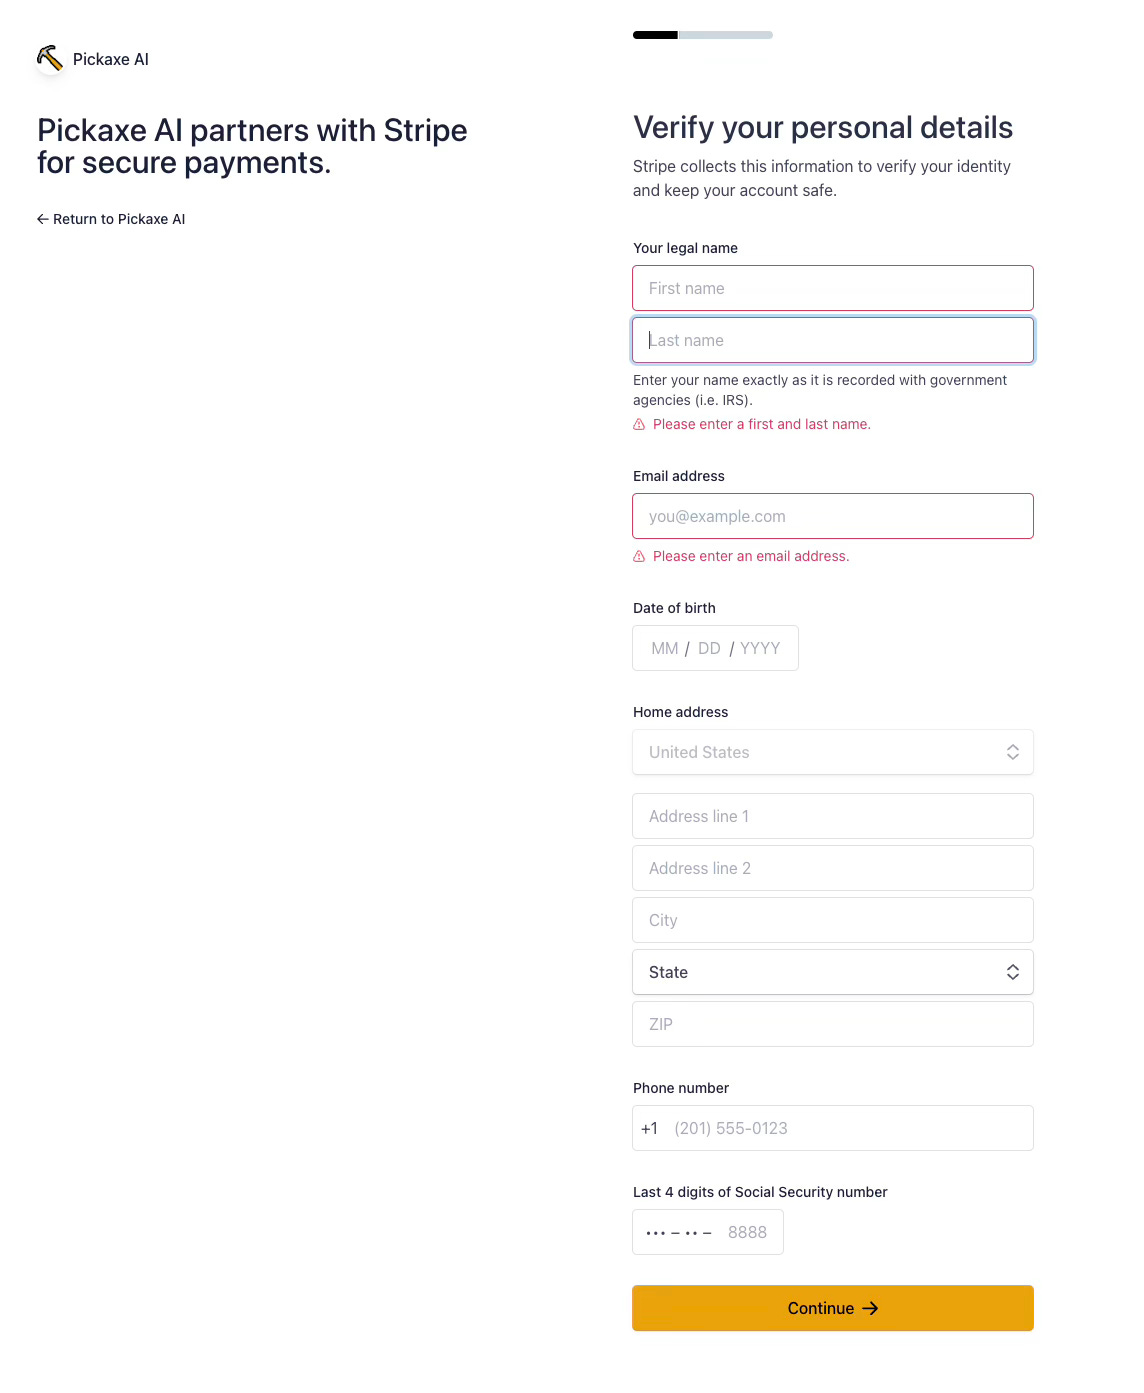
You’ll be asked a series of questions about how you intend to use Stripe.
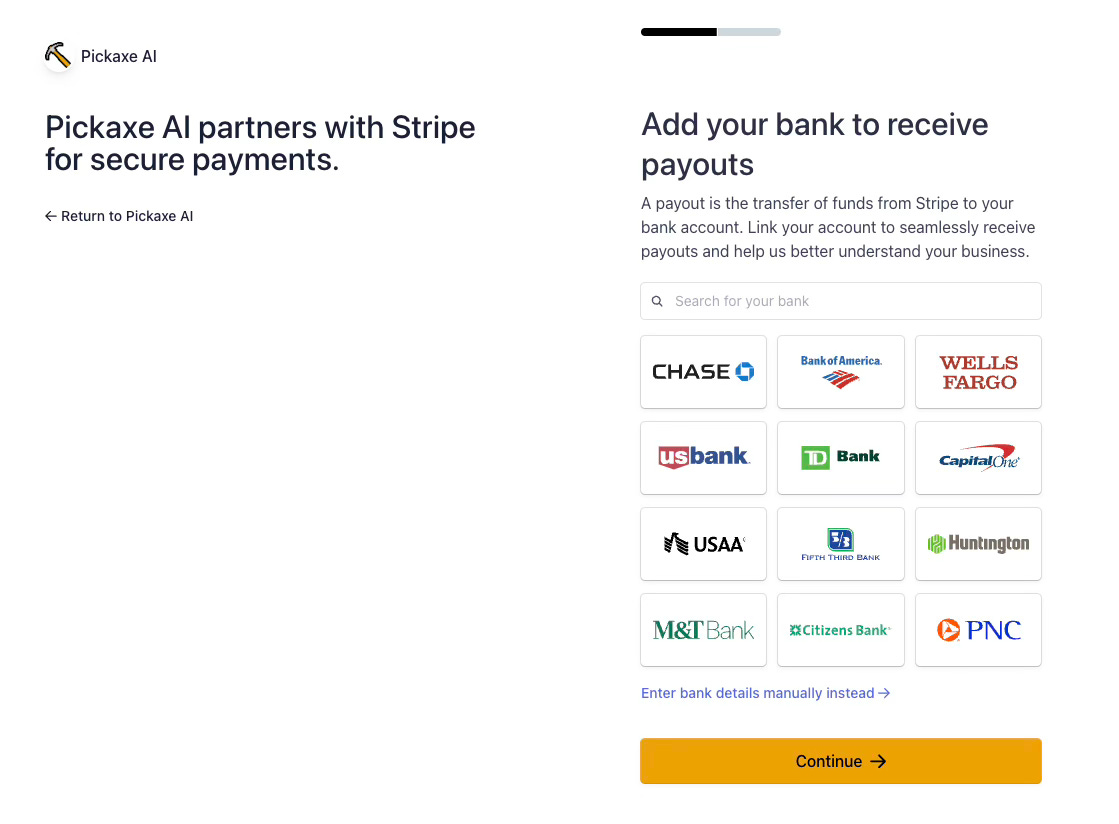
Once you have completed creating your account you will be able to select your bank account and arrange for funds you earn from Pickaxe to be deposited into your account.
Depending on who you bank with you’ll either be able to log in through the sign on screen you’re used to using with your bank, or you may have to look up your account number and routing number and enter them in manually.
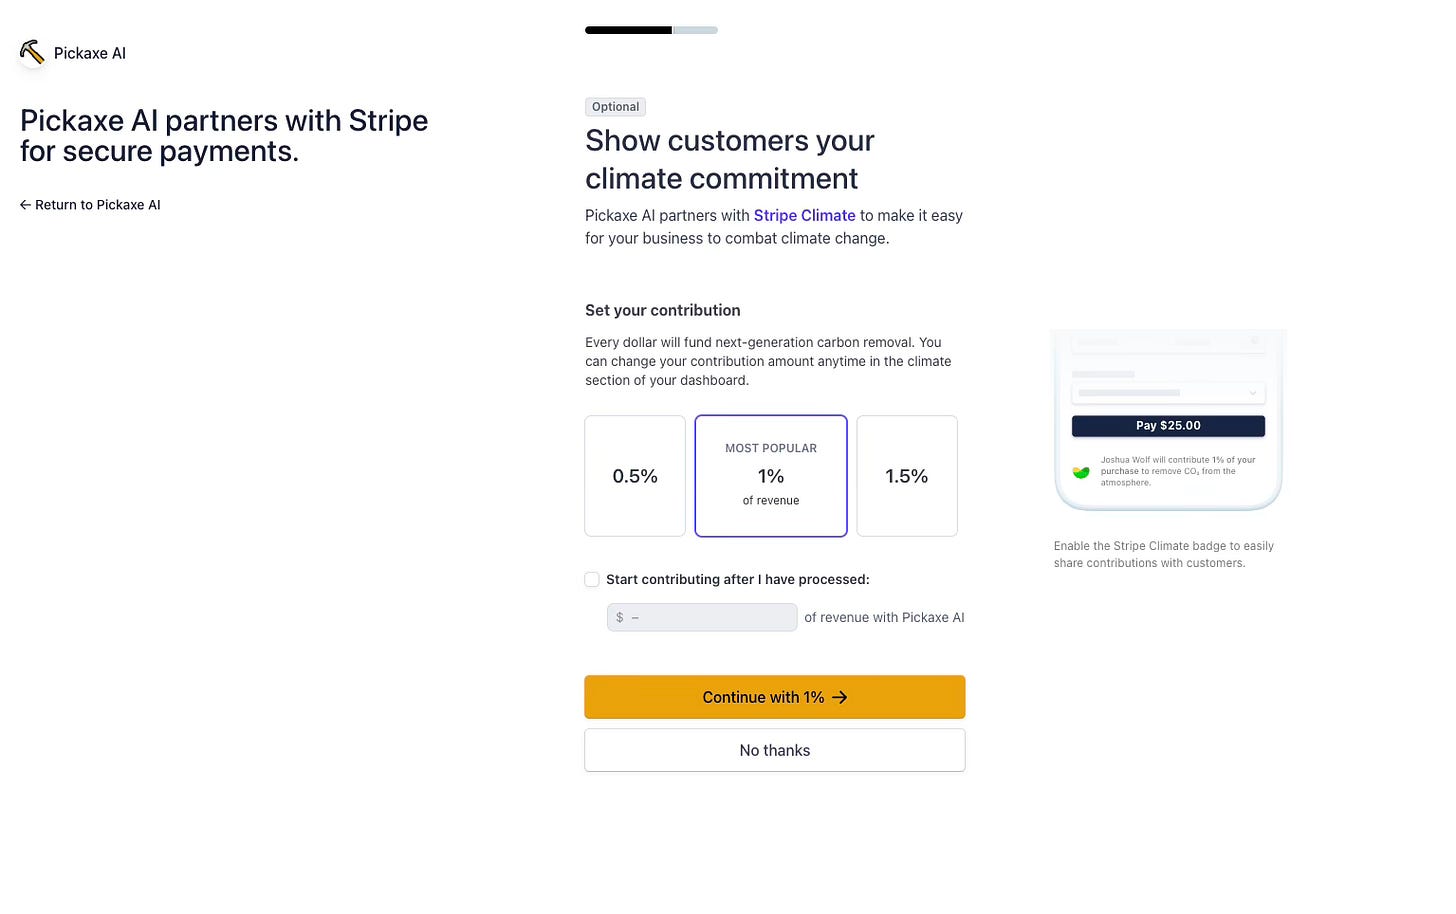
The last step to register your Stripe account is to decide whether or not you’d like to donate a portion of your earnings to remove carbon from the planet.
As soon as you complete the process you’ll be redirected back into your Studio where you can continue to refine and manage your creation.
Let the Joy Unfold
In just three simple steps—creating a Pickaxe, building a Studio, and registering with Stripe—Pickaxe Studio empowers you to start earning money from your creations. It's a golden opportunity to turn your innovative ideas into a revenue stream, all while engaging with your audience in a dynamic and meaningful way.
I'm taking my freedom / Putting it in my stroll / I'll be high-steppin' y'all / Letting the joy unfold / I'm livin' my life like it's golden. —Jill Scott “Golden”
Pickaxe Studio allows you to take control of your creative freedom, infusing it into your digital creations and sharing your unique voice with the world.
With Pickaxe Studio you're crafting a golden path for your future. Each step you take in this platform is a stride towards living your life like it's golden, embracing the freedom to create, innovate, and monetize your passion.
So, go ahead, let your creativity shine, and let Pickaxe Studio be the vehicle that drives your dreams to reality.
Here's to living your life like it's golden, with Pickaxe Studio as your partner in success!



Thank you for this! I am trying it out now and am having trouble finding that paid tier part but I'll keep looking. I think the site has changed a bit.